Sale
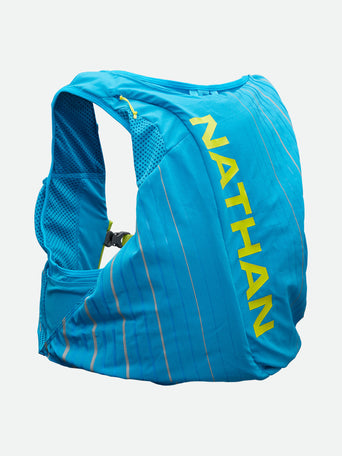
Pinnacle 12 Liter Hydration Race Vest
$220.00
$110.00
$49.00 away from FREE Shipping
Your cart is currently empty.
Continue Shopping2L BPA-free bladder keeps you hydrated on the run. Made for all Nathan® vests and packs.
Our Loyalty/Rewards Program lets you earn points on every purchase. Join Now
Hydrate with only the best. When you are on a hike, trail run or a marathon, the most important thing is having a BPA-free hydration bladder. With the 2.0 Liter Hydration Bladder, you will have high flow bite valves and large, easy-fill openings that now come with quick release hoses for convenient cleaning. Save time with a faster set-up in your favorite Nathan Race Vest.
PEAK PERFORMANCE
BPA-free hydration bladder includes quick release hoses for convenient cleaning and a faster set up. Compatible with other Packs/Vests: Pinnacle Pro and Breeze Vests, VaporAir, VaporAiress, and QuickStart 3.0 Packs.
EASY CLEAN
With the high flow bite valves and oversized, easy fill openings that come with quick release hoses, you can easily clean your bladder.
TO CLEAN BLADDER
OTHER CLEANING TIPS
STAINS
Bladder staining is generally caused by food coloring used in liquids. This staining does not affect the functionality of the bladder, yet can be difficult to remove. We recommend using a chlorine free, non-toxic, and biodegradable tablet to combat stains and odors.
PLASTIC TASTE
Occasionally users may notice a plastic taste. To reduce, squeeze lemon juice into the reservoir, fill with water, and place in the freezer. After frozen, remove, thaw, and rinse.
LUBRICATION
Some users may need to occasionally lubricate the rubber O-ring on their connector to ensure a smooth connection and for leak prevention. If necessary, apply glycerin, silicone, or pure beeswax as lubricants. Avoid olive oil, coconut oil, cooking oils, etc. These types of oils cause the seal to swell and make it difficult for the system to be disengaged.
Step 1: Fill bladder and hose with warm soapy water, shake bladder and hose
Step 2: Remove soapy water, detach hose and turn bladder inside out
Step 3: Use warm water to rinse thoroughly both hose and bladder
Step 4: Turn bladder upside down over paper towel holder, or stuff with paper towels, and leave hose on dry rack
Enjoy your run!
Step 1: To ensure you find the right length, place the bladder in the hydration pack opening at the top
Step 2: Secure the bladder to the vest
Step 3: Pull the hose through the left or right hole at the top of the pack and bring the hose to the front strap
Step 4: Secure the hose to the clip and then bring the hose to your mouth to confirm the best length
Step 5: Use a pen to mark the best length of the hose
Step 6: Remove entire bite valve and use scissors to cut the hose to the desired length
Step 7: Use firm grip to reattach the hose. Make sure that the valve is fully secured before using
Enjoy your Run!
Watch video


